If you’re reading this, chances are your stainless steel solar surface pump just wrapped up a long, demanding growing season, watered rows of crops, filled stock tanks, or kept a remote property’s plumbing running reliably—and now you’re staring at a few quiet months where irrigation needs are minimal, or maybe even non-existent. As a supplier of stainless steel solar surface pumps, I’ve spent the last decade working with small-scale farmers, ranchers, and off-grid homeowners who ask me the same question every year: “If the pump works great in the heat and heavy use, why does it seem to act up every time I pull it back out in spring?” More often than not, it’s not a mechanical failure, a bad solar panel, or even a dead battery—it’s poor off-season storage that chips away at stainless steel’s natural corrosion resistance, clogs impellers with dried sediment, or drains the solar system’s components so they can’t turn on when you need them most. Stainless Steel Solar Surface Pump

Today, I’m pulling back the curtain on the storage process I developed after troubleshooting over 200 pumps for our customers across the U.S., from the drought-prone Great Plains to the freeze-prone upper Midwest. This isn’t a generic tip list I found online; it’s the step-by-step routine we’ve honed to keep stainless steel solar surface pumps in peak condition during the off-season, so you don’t waste time or money when you’re ready to turn them back on. Let’s start with the most common mistake I see people make: skipping the pre-storage prep that protects the very thing that makes our pumps last longer than most—their stainless steel build.
First off, let’s ground this in why stainless steel matters here. Unlike carbon steel, which rusts if left damp, stainless steel (for those who don’t know, our pumps use 304-grade stainless steel) contains chromium, which forms a self-healing oxide layer when exposed to oxygen. That layer is what makes our pumps resistant to rust, even in slightly acidic or mineral-rich water. But if you leave caked-on mud, dried algae, or hard water deposits on the pump during storage, those materials trap moisture and abrasive minerals against the steel surface, breaking down that oxide layer and causing pitting corrosion that can turn a 15-year pump lifespan into 5 years. That’s why the first rule of storage is never to put your pump away dirty.
Let’s break this down step by step, starting with when to turn the system off in the first place—don’t just wait for a hard freeze. I always tell customers to pull the pump once the last of the seasonal watering is done, or when nighttime temperatures consistently drop below 40°F (4°C), even if there’s no ice yet. That gives you a window of a few weeks to work before deep freezes hit, which is critical because frozen water expands and can crack pipes, damage pump housings, and ruin batteries. The worst call I ever got was from a rancher in Nebraska who waited until a -5°F night to pull his pump; the water left in the discharge line froze, split a 2-inch stainless steel fitting, and he had to wait three days for a replacement to get his cattle watered in spring. Trust me, don’t cut that timeline short.
Once you’ve pulled the pump out of the well, pond, or stream, the next step is the big clean that will prevent 90% of off-season issues. Start with the pump itself, not the pipes. We use a gentle, food-safe biodegradable cleaner (no harsh acids—those eat through stainless steel’s oxide layer) to break down dried mud, algae, and hard water scale. If you have a high-pressure washer, set it to no more than 1,000 PSI—anything higher can bend the impeller blades or chip the stainless steel surface. Focus on the strainer at the inlet first, because that’s where most sediment gets trapped. If the strainer is clogged, soak it in warm, mild soap water for 15 minutes and scrub with a soft brush; don’t use a wire brush, as it can leave metal shavings that cause corrosion later.
Next, the impeller and volute—these are the parts that move water, and they’re super easy to damage if you’re not careful. On our pumps, the impeller is held in place by a small retaining clip; remove it, take the impeller out, and soak it in a bucket of warm water with a little vinegar (white vinegar works great for dissolving hard water deposits, and it’s safe for stainless steel). Gently scrub the volute (the curved part that surrounds the impeller) with a soft cloth to remove any built-up grime. If you notice any small cracks or chips on the impeller, give me a call or reach out to your supplier—we can send a replacement part, and it’s way cheaper to fix now than to replace the whole pump in spring.
Now, don’t forget the discharge and suction lines. Even if they look clean on the outside, the inside can have dried sediment or algae that will harden over the off-season, making it hard to push water through when you start up. For plastic or PVC lines, flush them with a garden hose to push out any leftover water and debris. For rigid metal lines, you can use a stiff plastic rod to clear any clogs, then blow them out with low-pressure air (no more than 50 PSI, so you don’t split the lines).
Once everything is clean, it’s time to drain all standing water. This is make-or-break in cold climates, but even in mild areas, standing water can cause slow corrosion. Tip the pump upside down for 24 hours to let all water drain out of the housing, impeller, and inlet/outlet ports. You can also pour a half-cup of propylene glycol (non-toxic, so it won’t harm your pump or environment) into the ports after draining—this creates a thin barrier that prevents moisture from getting trapped, even in high-humidity storage areas. Just make sure to flush it out with water before you turn the pump on in spring.
Now, let’s talk about the rest of the solar system, because the pump isn’t independent. The solar panels, charge controller, and battery bank all need proper storage too, and skipping this will leave your whole system dead when you need it. For the solar panels: wipe them down with a soft cloth and mild soap to remove dust, bird droppings, or pollen—these can scratch the glass and reduce their efficiency next season. If you’re storing them outside (on a rack, not the ground), cover them with a breathable tarp—plastic tarps trap moisture, which can cause corrosion on the panel frames, so a mesh or fabric tarp is best. If you’re storing them inside, lean them against a wall in a cool, dry area where they won’t get bumped.
The charge controller: turn it off, unplug it from the battery and panels, and store it in its original box if you have it. If you don’t, put it in a plastic bin with a few silica gel packets (the ones that come with shoes or electronics work perfectly) to absorb moisture. The big one here is the battery bank. Lead-acid batteries (the most common for solar pump systems) need to be charged to 50% of their capacity for storage—if you let them go dead, they’ll sulfatize, which is a permanent damage that makes them useless by spring. Lithium-ion batteries are a little more forgiving, but they still need to be stored at 40-60% charge. Once charged, store batteries in a cool area (between 50°F and 70°F is ideal—basements or garages work) and check their charge every 2 months with a multimeter. If they drop below that 50% mark, charge them back up—don’t just leave them unplugged all winter.
Now, where to store everything? A lot of people make the mistake of leaving the pump, lines, and panels outside in a shed or on a porch, thinking it’s “good enough.” But even covered, outdoor storage can expose your stainless steel pump to extreme temperature swings, rain, or even rodents that will chew on lines or cables. The ideal storage spot is a cool, dry, well-ventilated area—like a basement, a climate-controlled garage, or a storage unit for larger systems. If you have to store the pump outdoors (we know some customers have limited space), elevate it off the ground on a pallet so it’s not sitting in pooled water, and cover it completely with that breathable tarp I mentioned earlier.
For the stainless steel pump specifically, avoid storing it in contact with other metals—like steel pipes or iron tools. Even stainless steel can be affected by galvanic corrosion if it touches a more reactive metal for a long time. Wrap the pump in a soft cloth or plastic sheet to separate it from other items in storage.
Wait, one last thing: label everything. I can’t tell you how many customers come to me in March, digging through a pile of parts, trying to remember which wire goes to the charge controller, or which impeller fits which pump. When you take the system apart, take photos of all the connections, write down how many feet of line you have, and label each part with a marker—small things, but they save you hours of frustration come spring.
Let’s test this process with a real example from one of our regular customers, Mary, who runs a small vegetable farm in southern Minnesota. Last year, she followed every step I outlined here: pulled her pump in mid-October, cleaned the impeller, drained all water, stored the whole system in her basement with the panels on a rack, and checked the battery charge every 8 weeks. When she turned the system on in April, her pump fired up on the first try—no clogs, no corrosion, no dead battery. That’s the goal.
If you cut corners? Another customer, a rancher in Texas, skipped the deep clean and stored his pump in a damp toolshed last year. When he pulled it out in February, the inlet strainer was clogged with dried algae, the impeller was pitted, and the battery had lost half its charge. He had to replace the strainer and impeller, and charge the battery for three days before the pump worked—costing him $150 in parts and a week of lost time before calving season.
At the end of the day, your stainless steel solar surface pump is an investment—good ones last 10 to 15 years, but only if you take care of them during the off-season. The process isn’t hard, but it’s consistent. Skip one step, and you could be looking at repairs, replacements, or downtime when you need water the most.
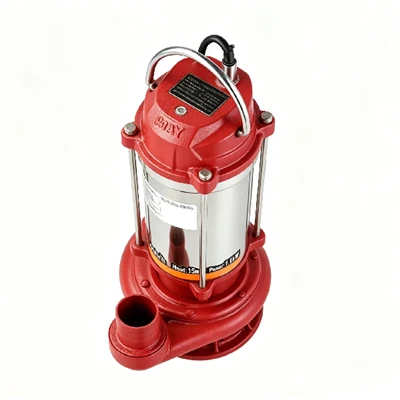
If you have questions about any step, or need replacement parts for your pump system, feel free to reach out to your supplier for guidance. We’ve worked with thousands of customers to get their systems prepped for storage, and we’re here to help make sure your next season is as smooth as the last.
High Flow Stainless Deep Well Pump References:
- National Water Well Association. (2021). Off-Season Storage Guidelines for Solar-Powered Water Pumps. NWWA Technical Bulletin Series.
- Stainless Steel World. (2022). Corrosion Resistance of 304-Grade Stainless Steel in Agricultural Pump Applications. Vol. 18, Issue 3.
- International Energy Agency. (2020. Off-Grid Solar System Maintenance Best Practices. IEA PVPS Task 15 Report.
- Battery University. (2023. Storage Guidelines for Lead-Acid and Lithium-Ion Batteries. Cadex Electronics Inc. Technical Paper.
Longbiao Pump Industry Co., Ltd.
We are one of the most professional stainless steel solar surface pump manufacturers and suppliers in China, featured by quality products and low price. Please rest assured to buy discount stainless steel solar surface pump for sale here from our factory. We also accept customized orders.
Address: Unit 101, Building 11, Pan’ao Entrepreneurship Park, Daxi Town, Wenling City, Taizhou City, Zhejiang Province, P.R. China
E-mail: 1653746797@qq.com
WebSite: https://www.cnlongbiao.com/
