If you’re a factory floor manager or operations lead, you know a bagging machine’s seal is non-negotiable. A bad seal doesn’t just ruin product— it leads to waste, customer complaints, and way too many late nights fixing messes. As a bagging machine supplier, I’ve worked with hundreds of teams dealing with this exact headache, and I’ve seen firsthand how small, fixable issues turn into big, expensive problems. Let’s break down the real, actionable ways to level up your sealing quality— no jargon, just stuff that actually works. Bagging Machine
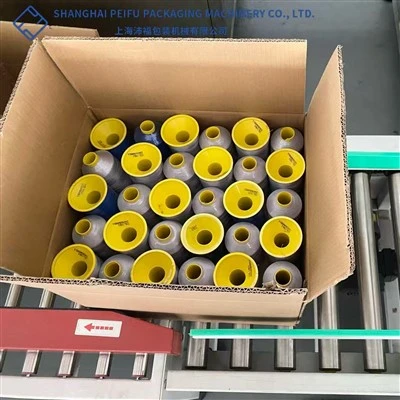
First, let’s cut to the most common mistake I see guys make: not prepping both the machine and the bag before sealing. I get it— time is money, and rushing through setup feels like winning. But if the seal jaws are caked with old adhesive, food residue, or even just dust from the factory floor? That seal won’t stick. I had a client a few months back packing granola bars who was losing 10% of his run to unsealed bags because he skipped wiping the jaws down. The fix? 5 minutes of cleaning per shift, not when the machine breaks. Use a lint-free cloth and isopropyl alcohol— nothing too harsh, no steel wool (that scratches the jaws, which makes seal marks uneven). Also, check the jaw alignment. If they’re not perfectly straight when closed, one side will seal hard and the other will be weak. Most modern machines have a quick alignment knob— just a quick twist every few days, not a full teardown.
Next, let’s talk about bag material compatibility. Not all bags are created equal, and trying to seal a polypropylene bag on a machine calibrated for polyethylene is a recipe for disaster. Wait, you already have the same machine for multiple bag types? No problem— just adjust the settings, but not in a blind way. Let’s keep this simple: thin, lightweight bags (like those for snacks) need lower temperature and shorter hold time. Thicker, heavy-duty bags (like those for construction aggregate or dog food) need higher temp and a longer squeeze on the jaws. I’ve seen guys crank the temperature all the way up because a thick bag wasn’t sealing— that just melts the bag’s edges so bad they leak all over the conveyor, and sometimes even damages the heat element. Pro tip: run a test seal on a scrap piece of your actual bag material first. Don’t use a random scrap from the supply closet— get a fresh bag from your supplier, cut a 2×2 inch piece, and tweak settings until you get a smooth, tight seal with no holes or wrinkles. Wrinkles in the bag edges during sealing are another big issue— they create weak spots that’ll split open when someone lifts the bag. Make sure the bag is feeding straight into the machine, not twisted or bunched up. A quick check before each batch takes 10 seconds, saves you hours of rework.
Then there’s the heat element itself. A lot of people forget that heating elements wear out, just like any part of the machine. If your seal temperature seems off— like it’s running 20 degrees hotter than the setting, or not heating up at all— check the element. Signs it’s bad: discoloration (brown or black spots on the metal), cracks, or uneven heating. Even if it looks fine, if it’s been over 12 months since you replaced it, it’s worth swapping. Cheap aftermarket elements are tempting, but I always recommend genuine ones from the machine’s manufacturer. They heat more evenly and last longer, so you don’t have to replace them every 6 months. Also, if your machine has a Teflon or silicone release film over the heating element? That’s there for a reason. If it’s torn, stretched, or caked with residue, it’ll stick to the bag and create bad seals. Replace it every 3 months for high-volume runs, or whenever you see it looking worn. I had a lumber supplier client whose release film tore halfway through a shift, and they ended up with 2,000 bags stuck to the jaws. Total waste? Around $1,500, all because of a $10 part. Ouch.
Pressure is another variable that’s often overlooked. Too little pressure, and the jaws don’t compress the bag edges enough to create a tight bond. Too much pressure, and you’ll squish the bag too thin, melt through the edges, or even warp the jaws. How do you get it right? Most machines have an adjustable pressure knob or a spring that you can tweak. Again, test with your actual bag material. For most standard 20lb pet food bags, a medium pressure setting works— squeeze the jaws closed, and you should feel firm resistance, not like you’re crushing a soda can or pushing a pillow. If you’re sealing flexible films, go a little lighter; if you’re sealing woven poly, go a little heavier. One trick I teach all my customers: do a “pull test” after each test seal. Grab the seal edge and pull firmly— if it doesn’t come apart, that’s good. If it splits or pulls away from the edge, you need more pressure, a longer hold time, or both.
Wait, hold time— that’s the amount of time the jaws stay closed while heating. This is tied directly to temperature and pressure, but it’s its own beast. Thin bags only need 0.5 to 1 second of hold time; thick, heavy bags might need 2 to 3 seconds. If you set the hold time too short, the heat doesn’t have time to melt the bag’s plastic enough to bond, so when you release the jaws, it separates. Too long, and you get that messy over-melt I talked about earlier. Some machines have a timer setting, which is super easy to adjust. If yours is older and has a foot pedal that controls hold time, practice keeping the pedal down until the right amount of time passes. It’s a skill, but after a few runs, you’ll get it.
Now, let’s talk about the stuff you can’t see— the machine’s maintenance schedule. I know, schedules feel like busywork, but they’re the backbone of good sealing. What’s on that schedule? Daily: wipe down jaws and release film, check alignment, run a test seal. Weekly: tighten any loose bolts around the seal assembly, lubricate moving parts (use only the manufacturer’s recommended lube— not generic oil you have in the shop), check for frayed wiring on the heat element. Monthly: calibrate the temperature. Wait, calibrate? Yeah, even if the machine’s display says 300 degrees, it might be off by 20 or 30 degrees. You can pick up a cheap infrared temperature gun for $20, point it at the seal jaw while it’s heating, and adjust the machine’s setting to match. That’s a game-changer for a lot of guys. I had a coffee roaster customer a while back who was under-sealing his whole batch because his display was 50 degrees lower than the actual temp. Calibrating fixed that overnight, and he saved $4k a month in product waste.
Also, don’t sleep on operator training. I’ve been in factories where the new guy is running the bagging machine with 2 hours of training, and the old guy who’s been there 10 years is on a different machine. That inconsistency kills sealing quality. Make sure every single person running the machine knows the basics: how to check jaw alignment, how to do a test seal, what the settings should be for different bag types, and how to spot a bad seal before it becomes a whole batch problem. I do 30-minute on-site training sessions for all my regular customers, and it’s one of the most valuable things we offer. Most operators pick it up in a day, but even a quick refresh every few months keeps everyone on the same page.
Wait, what about environmental factors? If your factory is super humid, or way too cold, that affects the seal too. High humidity can make the bag’s plastic not bond well— if your plant has AC, make sure it’s set to a comfortable temperature (around 65-75 degrees F) for the sealing area. If you’re running in a cold warehouse, the bag material might be stiff, so you might need to crank the heat a little longer to get it to melt properly. I once worked with a frozen food supplier who had terrible seals in the winter because their sealing area was next to a loading dock that was always open. Moving the machine 10 feet away from the dock fixed almost all their seal issues. Simple stuff, right?
Let’s wrap this up with a few quick troubleshooting tips for when you’re in a pinch. If your seals are splitting: check pressure, hold time, and jaw alignment. If they’re melting through: lower temperature, reduce hold time, check that you’re not using the wrong bag material. If you have wrinkles in the seal: make sure the bag is feeding straight, adjust the guide rails on the machine so the bag is centered. If the seal looks weak or spotty: clean the jaws and release film, check the heating element for wear, calibrate the temperature.

At the end of the day, good sealing quality isn’t rocket science. It’s about small, consistent checks, not rushing setup, and knowing how your specific bag and machine work together. As a bagging machine supplier, my job isn’t just to sell you a machine— it’s to make sure that machine works as hard as you do, without costing you extra time or money fixing bad seals. If you’re dealing with recurring seal issues, or you just want to upgrade your current machine to get better consistency, reach out to our team anytime. We can walk you through troubleshooting, recommend the right parts, or even help you tweak settings to match your exact product needs. No sales pitch, no pressure— just honest advice from someone who’s worked side-by-side with factory teams for years.
Labeling Machine Reference
Bagging Machine Operator’s Manual. Industrial Packaging Equipment Association, 2022.
Plastic Packaging Sealing Best Practices. Journal of Manufacturing Operations, vol. 18, no. 3, 2021, pp. 45-52.
Preventive Maintenance Guidelines for Automated Packaging Equipment. Plant Maintenance Journal, vol. 25, no. 1, 2023, pp. 112-118.
Shanghai Peifu Packaging Machinery Co., Ltd.
We are one of the leading manufacturers and suppliers of bagging machine in China. With a professional production team, we are able to meet the needs of the majority of our customers. Please rest assured to buy customized bagging machine from our factory.
Address: No.1111, Xinlin Road, Fengxian District, Shanghai, China
E-mail: cathychensupplier@gmail.com
WebSite: https://www.peifupackaging.com/
